How to Create a Form
1. Create a Form Action
Navigate to the Threadly app in Slack.
Under ⚙️ Customization, click “Manage Actions”
Select “Create Form Action”

2. Creating a Form Element
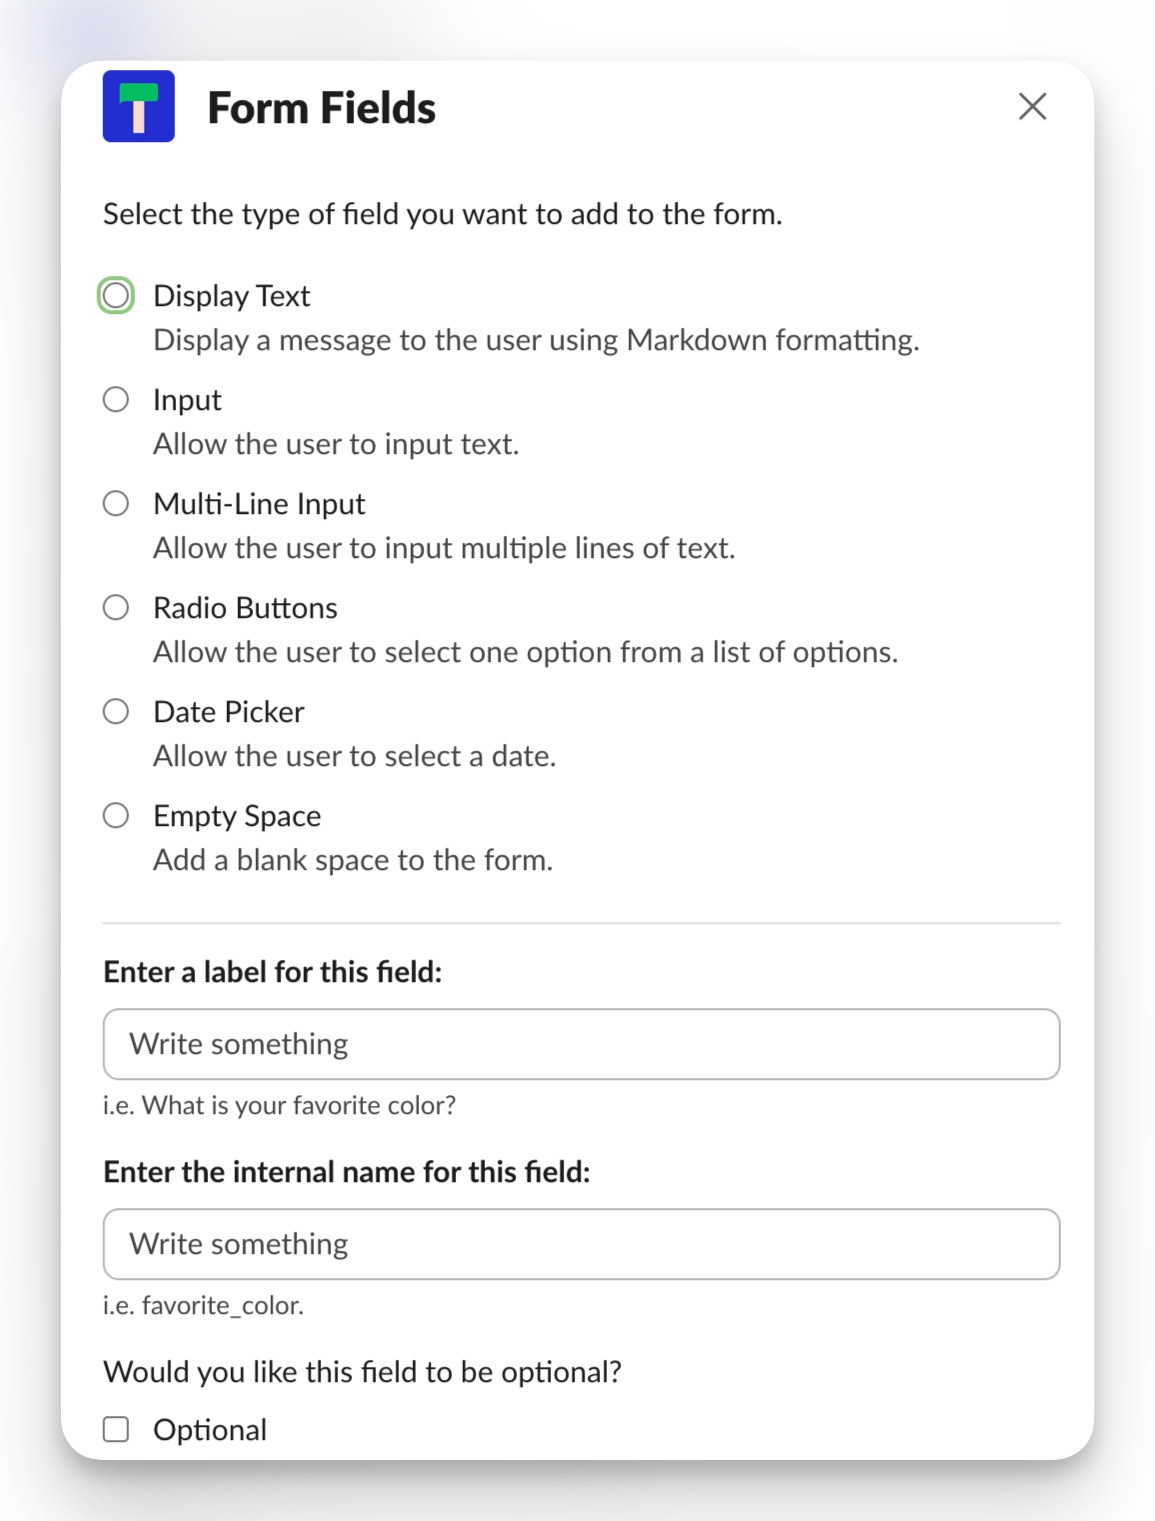
Once you’re on the Form screen, click “Add Form Element.” Form elements are the fields or inputs that you show to your users.
There are 6 elements you can choose from. One is for displaying purposes (i.e. an intro), one is empty space (for styling), and the other four are inputs for your users to fill in.
All fields can be set to optional. In these cases, it is up to the user to complete that field, or not. The four inputs are:
Input: Displays a one-line input text field
Multiline Input: Displays a multiline input text field
Radio Buttons: Displays a list of options for a user to choose from
Datepicker: Displays a date field for a user to select a date from

Once you select an element type, you can now fill in the label and the internal name for the field. The label is the public-facing text shown to the user, while the internal name is used for API and data purposes. For example:
What is your favorite color is a label; while the internal name can be color.
Repeating this process as many times as needed. As you add each element, your form will begin to take shape.

3. Form Customizations and Settings
There are five settings that are configurable to you.
Form Name: Customize the form name for internal use.

Save Form Data to Profile: Save the form responses to the user’s profile, for future filtering and use in Threadly.
Webhook Endpoint: Send your form’s responses to an endpoint, in real-time. The endpoint must be able to accept POST requests. Threadly only tries once, and does not retain webhook logs.
Anonymous Submissions: Store the user’s responses completely anonymously. Each user will be assigned an anonymous ID, and the user’s true identity will not be shown to the form owner, workspace admin, or Threadly admin.
Limit to specific users: Restrict completing this form to specific, preset users.
4. Publishing Your Form
Once you’re all ready, hit the Publish button at the top of the page. And that’s it!
Forms cannot be deactivated once they’ve been sent in a message, however, you can always edit the form fields and settings.
Last updated